Combine Video Clips Using Video Masking
Swap out the sky or replace a mirror reflection by combining separate clips creatively
It’s not easy to create the perfect setting to shoot a video. Compensate by taking advantage of the dynamic nature of video masks to alter your footage creatively! With Video masks, you can semi-automatically replace entire sections of your footage, making it possible to swap the plain sky for a sunset, replace a mirror reflection, change out the content on a phone or computer screen, and more.
How to combine clips using a video mask
Let’s look at replacing entire pieces of footage to combine clips creatively using video masks. Here, we’ll replace bright light coming through a window with a dark and fiery sunset.
-
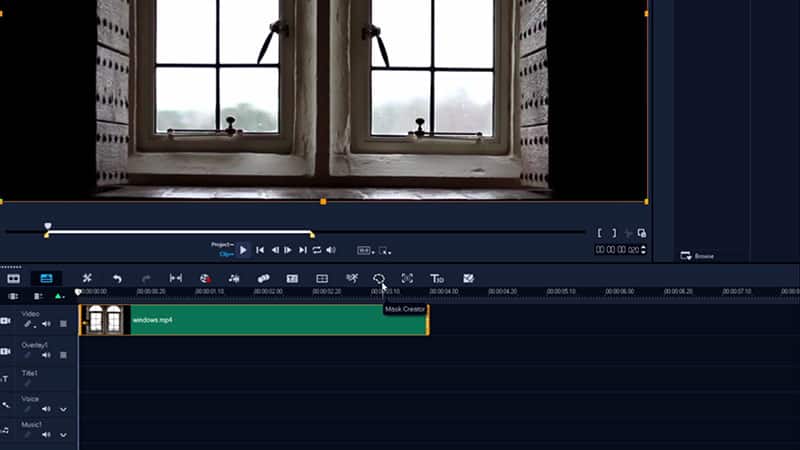
Select your clip and open the Mask Creator
Select the clip that you want to mask, and then click the Mask Creator button on the timeline toolbar.
![Create the mask]()
-
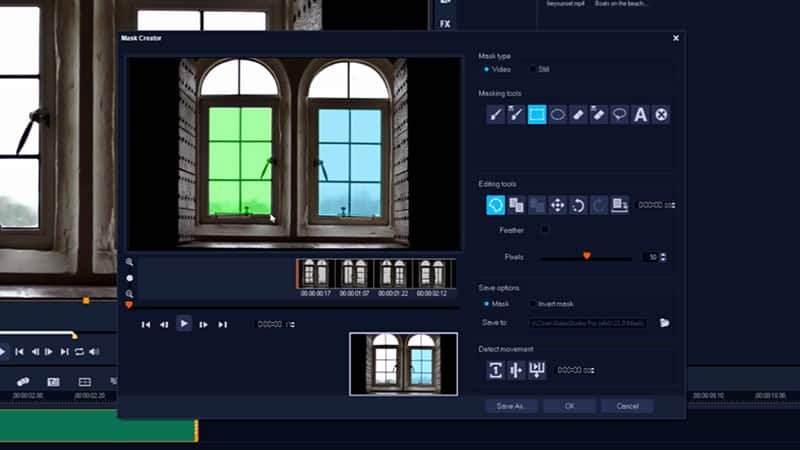
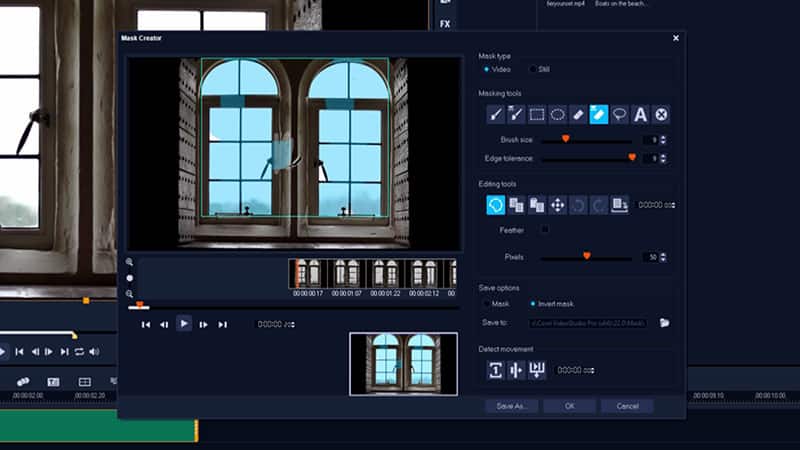
Create the mask
Use the masking tool of your preference to mark out the area you want to replace. The complexity of the shape and horizon line in your footage will determine how difficult it will be to mask it efficiently.
![Invert your selection]()
-
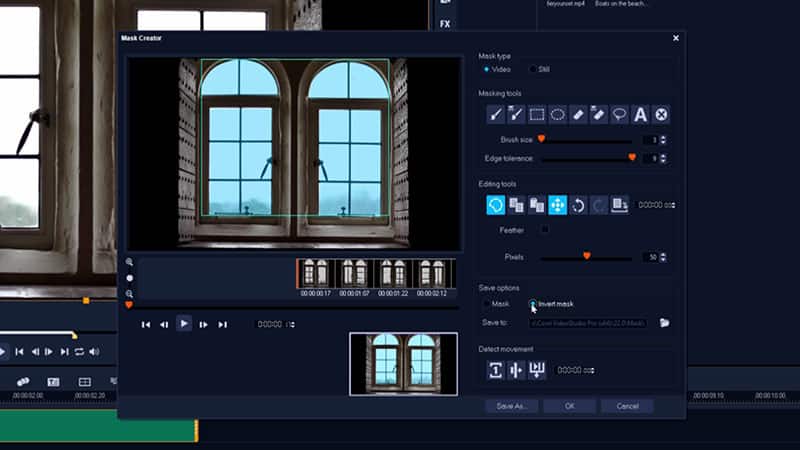
Invert your selection
Click ‘Invert’, as we want everything except the area we’ve selected to still be visible. Generally this is easier than selecting everything except the area from the beginning.
![Track motion]()
-
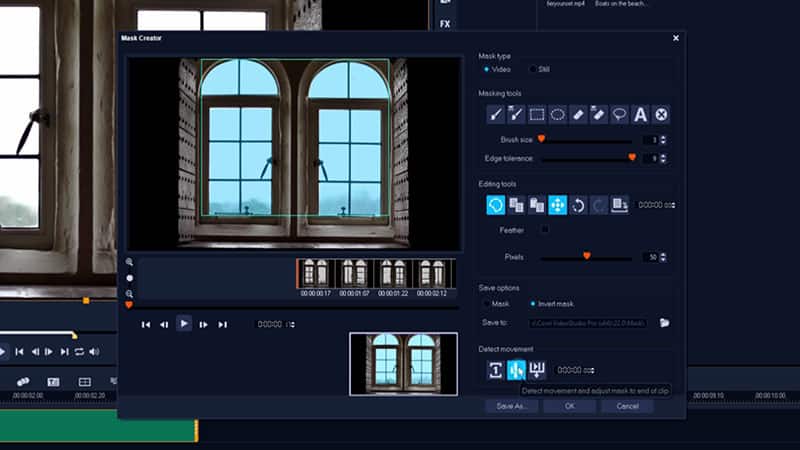
Track motion
Click ‘Detect movement and adjust mask to end of clip’ and VideoStudio will begin processing the mask automatically for you.
![Track motion]()
Need to Download VideoStudio?
Download a free 30 day trial now!
-
Make mask adjustments
Watch the mask creation process. If the mask creator starts to ignore areas that should be masked or include areas that should not be included, click ‘Cancel’, go back to the frame where the problem starts, correct the mask, and then click ‘Detect Motion and adjust mask to the end of the clip’ again. The program will start the automatic masking process from the point where you made the correction.
![Make mask adjustments]()
-
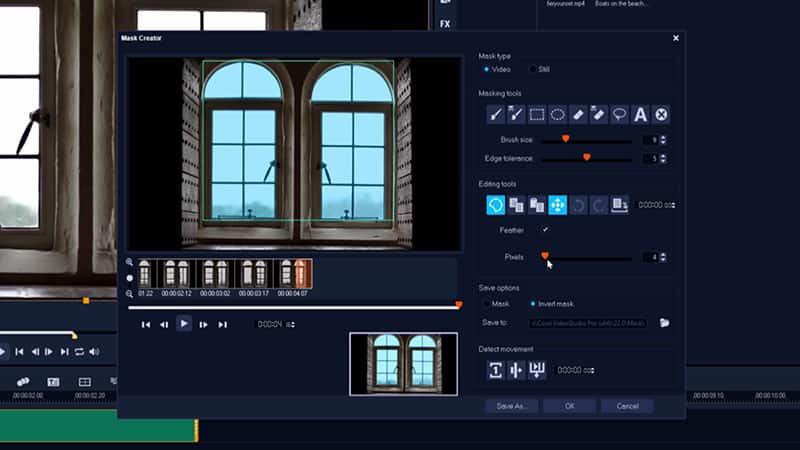
Feather the mask - OPTIONAL
It’s generally better to avoid feathering your mask in this case as you want to ensure a crisp, clear line. However, if you have a more complex clip, feathering may help to better integrate your replaced clip. Once the mask has finished processing, you can click ‘Feather’ and use the slider to adjust the blending of the outside of the mask to fit your liking. Once finished, click ‘OK’ to return to the timeline.
![Feather the mask]()
-
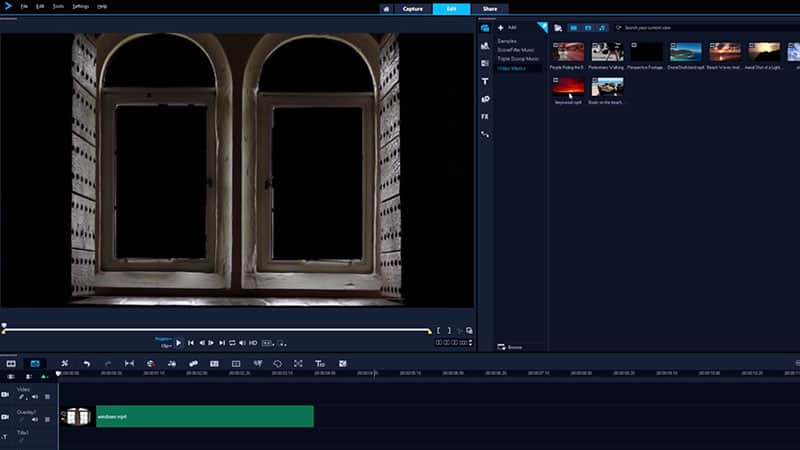
Replace the original clip
Delete the original clip, and drag your replacement clip to the timeline so that it shows through the mask you’ve just created. If your replacement clip is longer than the original clip, you can simply drag your replacement clip to your original clip, and hold CTRL as you release the mouse to automatically swap out the old clip with the new clip.
![Replace the original clip]()
-
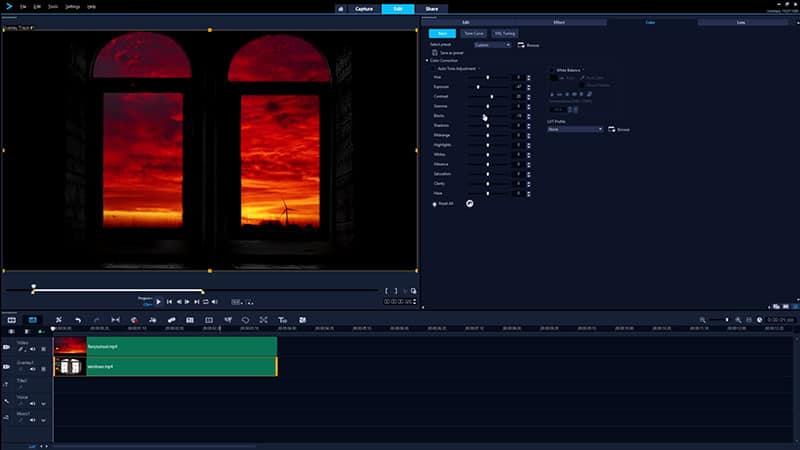
Match tones across your combined clips
For this effect to look smooth and integrated, it’s best to adjust the coloring of your clips to better suit each other using Color Grading. The more cohesive the contrast, brightness and tones can be across your combined clips, the more natural the replacement will look.
![Match tones across your combined clips]()
Swapping out sections of footage is just one of the ways you can use Video Masks to combine clips creatively. Video Masks can also be used to recognize motion from within your footage to create unique transitions. Open a closet door to reveal a hidden world, or have a passerby reveal the next shot. Take a look at how to accomplish these effects here!