Creative Title Reveals Using Video Masks
Integrate your titles with your scenes by using motion within your footage
Integrating text into videos is a great way to convey information to your audience. The less disruptive titles can be, usually, the better! You can create unique title reveals using video masks. You can use static text masks to show footage through text on your screen, but only video masks will allow you to use the movement of an object within your clip to reveal your title to blend it smoothly into your project using a video mask. This use for video masks is great for making text appear to interact with objects in your footage, and can add depth to your video.
How to reveal titles using a video mask
Let’s take a look at how to get a title to appear from behind our subject as she spins. Before beginning the masking process to integrate your title behind an object in your footage, add the title as you like it and apply any necessary motion or customizations.
-
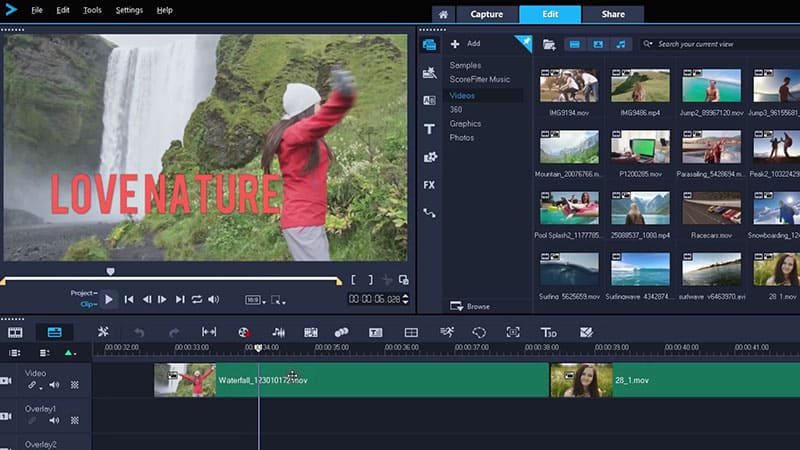
Split your clip
Scrub through your video clip to identify the last frame before you want your title to begin to appear on screen, and split the clip there. Next, find the first frame where your title should be fully revealed on screen, and split the clip there. Splitting the clip will reduce render times while you’re creating your mask. Click your newly split clip, and then click the Mask Creator button on the timeline toolbar.
![Split your clip]()
-
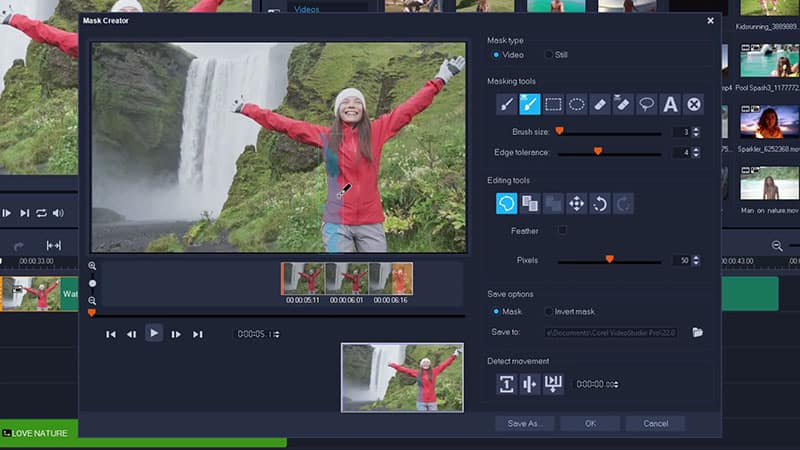
Create the mask
Now that you’re in the Mask Creator, scrub through your footage to find the last frame before your title begins to show (depending on the title you’ve added, this may be the very beginning of the clip). This is where we’ll begin creating the mask.
Use the masking tools to mask the area shown between the edge of your shot and the object moving to reveal it.
In most cases, once you’ve marked out the side of your object, you can use the rectangle tool to easily mark off the remaining space between your object and the edge of your shot.
![Create the mask]()
Need to Download VideoStudio?
Download a free 30 day trial now!
-
Track your object’s motion
For best results, only track the motion of your subject forward one frame at a time, as it’s likely that lots of manual adjustments will be needed at first. Once you’ve hit approximately the halfway point, feel free to click ‘Detect movement and adjust mask to end of clip’ to see how well it does automatically filling in the remainder of the mask.
![Track your object’s motion]()
-
Make mask adjustments
Watch the mask creation process. If the mask creator starts to ignore areas that should be masked or include areas that should not be included, click ‘Cancel’, go back to the frame where the problem starts, correct the mask, and then click ‘Detect Motion and adjust mask to the end of the clip’ again. The program will start the automatic masking process from the point where you made the correction.
![Make mask adjustments]()
-
Feather the mask - OPTIONAL
With natural motion blur already occurring, feathering your mask should help to smooth out the transition between your object and the title being revealed. Simply click ‘Feather’ and use the slider to adjust the feathering of the mask to fit your liking. Once you’re happy with the mask, click ‘OK’ to return to the timeline.
![Feather the mask]()
-
Layer clips and preview mask
Layer your title above your mask but below your original clip on the timeline so that the title is hidden behind your mask, and play the video to ensure the transition is smooth. Jump back into Mask Creator to make final tweaks if necessary.
![Layer clips and preview mask]()


The same process shown above to create a video mask that creatively integrates titles can be applied to creating unique transitions. See how to accomplish walk-by and door-opening scene transitions by following the steps outlined here! There are more unique ways to add titles to your video project. Take a look at how to add powerful titles that display video inside your text here!