How To Make A Timelapse Video
You can make a timelapse video with video editing software like VideoStudio. Follow along with our tutorial below to learn the easiest way to make a timelapse video. Timelapse videos - although not thrilling to make - can lead to some incredible results. The concept behind a timelapse is that the video condenses a long period of time into just a few seconds or minutes. It lets you visualize slow processes easily, or add a stylish effect to your films. Whether you’re making a timelapse of stars or clouds crossing the sky, ships coming in and out of port, or snow melting, time-lapses can add depth and excitement to your finished video, or work great as standalone pieces of content.
When you shoot images for a timelapse video we recommend that you use a tripod or set your camera on something stable, this will reduce movement in the footage and help the video look better. Read on and we’ll help you learn how to make a time-lapse video.
How to make a timelapse video from a video file
-
Install VideoStudio
To install VideoStudio video editing software on your Windows PC, download and run the installation file above. Continue following instructions on the screen to complete the setup process on your system.
-
Add video to the timeline
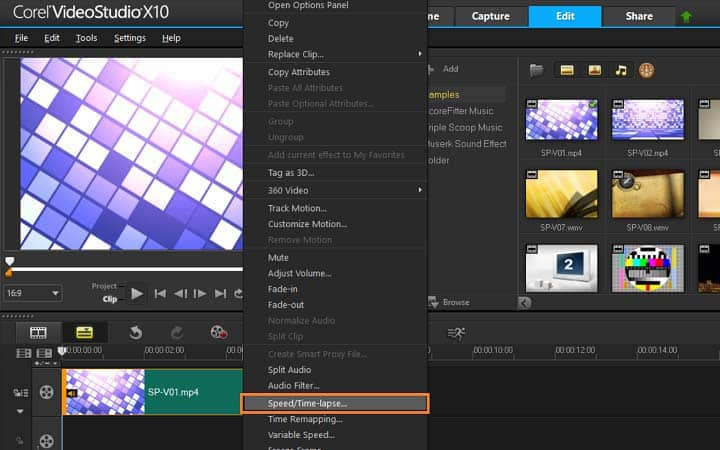
Drag and drop the video you want to make into a Time Lapse video onto the VideoStudio Timeline. To make a timelapse video from a video file, we will simply adjust the speed to make it playback faster.
![Add video to timeline]()
-
Create Time-lapse video
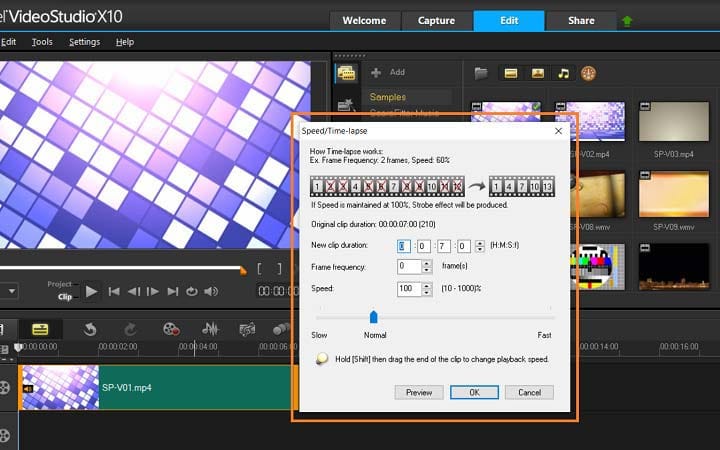
Right-click on your video on the timeline and select Speed/Time-lapse. In this window, you can drag the speed scrubber to the right to increase the speed, preview the results and make adjustments until you are happy with the results. When you are happy with the results, press OK.
![Create Time-lapse video]()
How to make a time lapse video from a series of photos
-
Install VideoStudio
To install VideoStudio video editing software on your PC, download and run the installation file above. Continue following on-screen instructions to complete the setup process.
-
Start your Time-lapse video
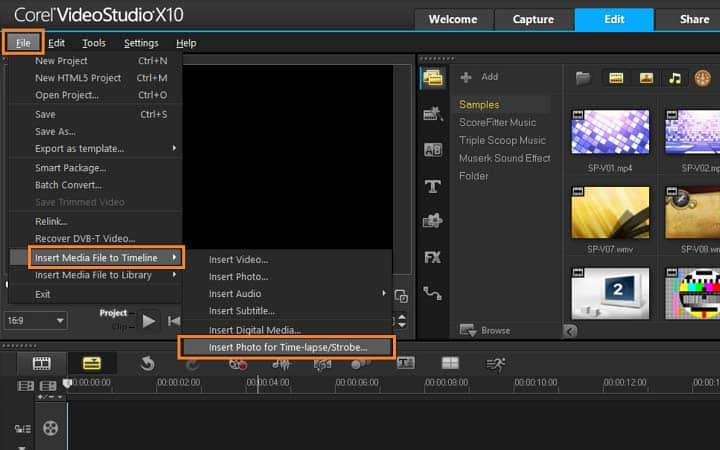
In VideoStudio under the File menu, select Insert Media File to Timeline and then Insert Photo for Time-lapse/Strobe.
![Start your Time-lapse video]()
-
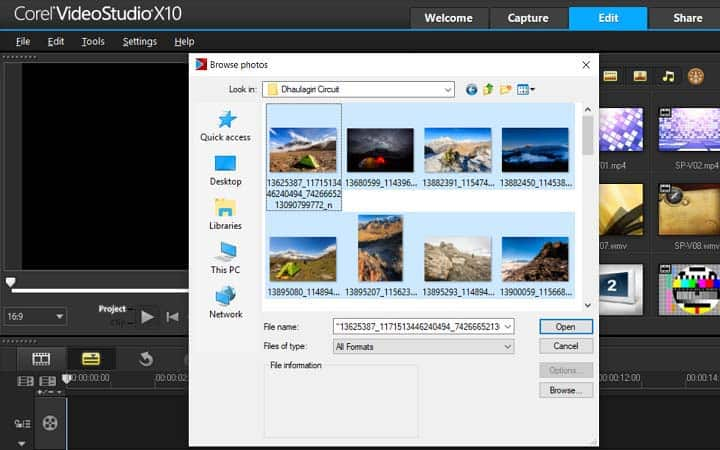
Add your series of photos
Browse for the photos you want to include in your project and click Open. Note: It is recommended to choose a series of photos taken in succession with your DSLR. As with all photography, you may want to do a batch edit to make the images look great before you import them.
![Add your series of photos]()
-
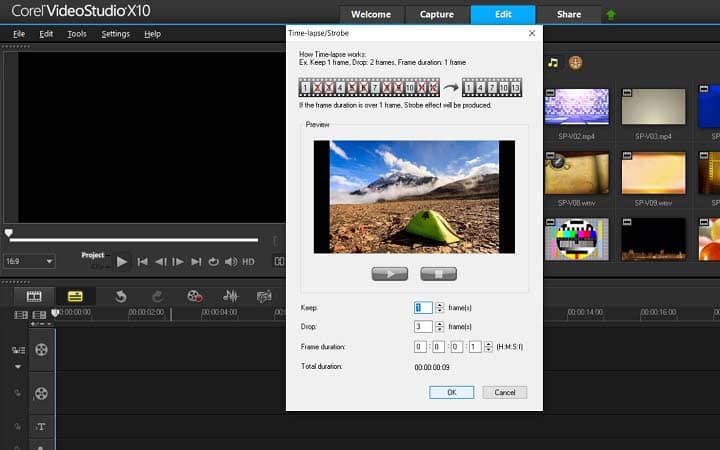
Make adjustments as needed
Once you’ve selected your files, in the next window you can make adjustments to the frames. As you make adjustments, preview the results using the playback controls under the picture. You can specify the number of frames to be retained and removed in Keep and Drop. Note: For example, you enter a value of 1 in Keep and 3 in Drop. This means that it will follow the interval to retain one frame and remove three frames for the set of photos selected. In Frame duration, specify the exposure time for each frame.
![Make adjustments as needed]()
-
Press OK to return to editing
Once you are happy with your results, press OK to add this to your timeline. After you add effects and edit your video you can choose to share it online via your website, blog, email, YouTube, Facebook, Instagram, Twitter, and other social media sites. Or you can save it to your computer in popular file formats. Make sure that the size of your video is correct for the program you are using on.
