How To Export Video
You can export video with video editing software like VideoStudio. Follow along with our tutorial below to learn the easiest way to export video. Once you have created your video and you’re happy to post it to your chosen platform, all you need to do is export it. This takes all the effects, video clips, images, music, colour and edits you have made and creates a single video file for you to upload to YouTube or somewhere similar. Your export settings will differ depending on what you intend to do with your film, so read on to find out more about how to export video in VideoStudio.
Corel VideoStudio lets you save your movie project to video file formats that you can playback on computers, popular devices, upload to social media sites or burn to disc.
NOTE: Before rendering your entire project into a movie file, make sure you first save it as a Corel VideoStudio project file (*.vsp) by clicking File > Save or Save As. This lets you return to your project at any time and make edits.
-
Install VideoStudio
To install VideoStudio video editing software on your PC, download and run the installation file above. Continue following on-screen instructions to complete the setup process.
-
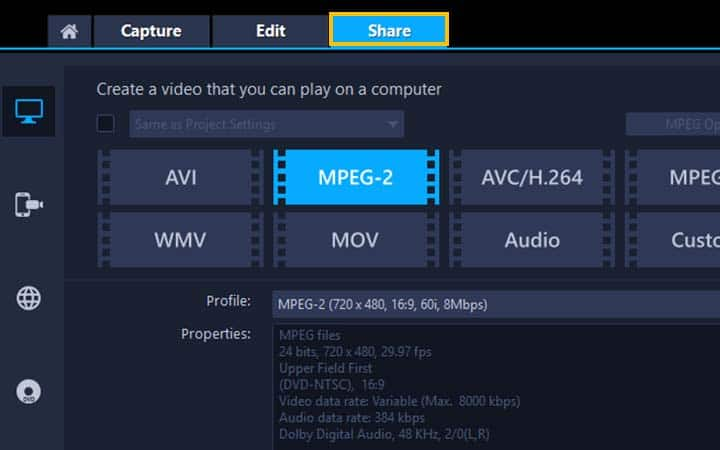
Enter the Share Tab
When you’re done editing your video, enter the Share workspace and along the vertical menu, select the option you wish to export too:
- Save for computer playback - here you can select the video format you wish to export to (AVI, MPEG-2, AVC/H.264, MPEG-4, WMV, MOV etc) and control the properties of the export. If you want to use the Project Settings for the video file, enable the Same as Project Settings check box located above the buttons.
- Export to file compatible with popular devices: Here, you highlight which device you wish to export to, and select the parameters from the drop down menu.
- Share online: Select YouTube, FaceBook, Flickr and vimeo and log into your account.
- Burn to disc: select the type of disc you wish you burn to and a new dialog will open up.
![Enter the Share Tab]()
-
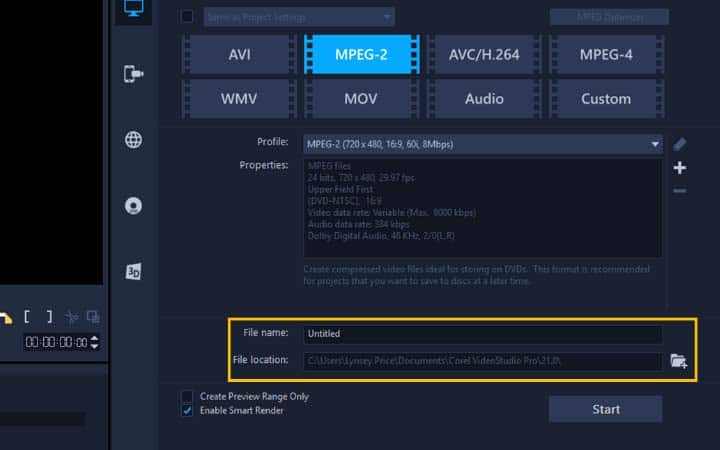
Name your project
In the file name and location boxes, you can name your file and select which folder to save it in.
![Name your project]()
-
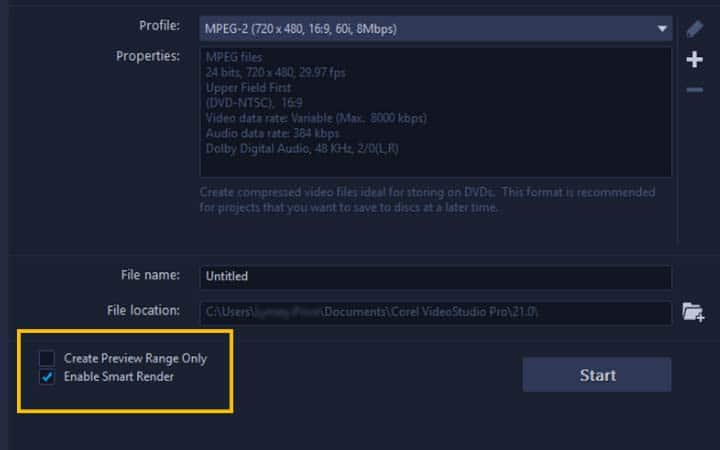
Control the export settings
Before export, you can select the following options:
- Create Preview Range Only — renders only the section of video that is selected between the Trim Markers in the Preview panel.
- Enable Smart Render — analyzes a video for any previously rendered sections and renders only the new or revised sections. This can reduce rendering time significantly.
![Control the export settings]()
-
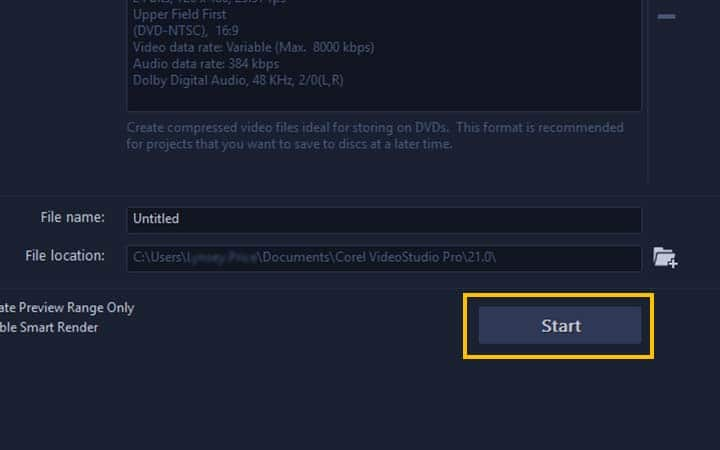
Press Start to begin exporting your video
When you’re all set up, click start. A progress bar appears when you render a video.
- Click the Pause/Play button on the progress bar to pause and resume the rendering process.
- Click the playback button to enable the preview while rendering or stop the preview to reduce rendering time.
- At any point, you can press the [Esc] key to cancel the rendering process.
![Press Start to begin exporting your video<]()