Why screen record a presentation?
Online courses, educational webinars, and remote work teams all rely on the ability to present and share information online. The ability to record your screen to capture a presentation allows you to review the information shared in the presentation at your own pace after the official presentation has ended!
Recording a presentation can be especially helpful if a team member is unable to attend, if you’re expected to take notes throughout, if the presentation will need to be transcribed, or if you’re anticipating an interruption or distraction that will prevent you from giving the presentation your full attention while it is happening live.
How do I screen record a presentation?
Video editing software like VideoStudio has intuitive screen recording and webcam video capture tools built in to help you record your screen to capture presentations, webinars, and other videos from your screen so you can stay informed to the last detail.
1. Download VideoStudio
VideoStudio offers included tools to capture screen recordings, system audio and even webcam video simultaneously with MultiCam Capture Lite. To install VideoStudio, download and run the installation file here. Continue following on-screen instructions to complete the setup process.
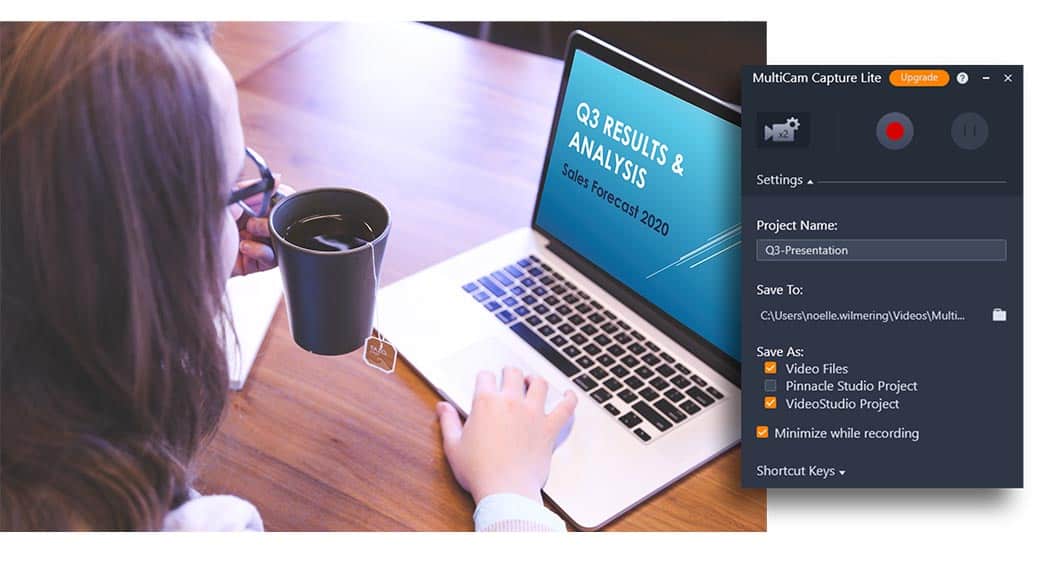
2. Open MultiCam Capture Lite
Once you have opened MultiCam Capture Lite, you can define the area of the screen you want to record. MultiCam Capture Lite will select the full screen by default, or you can customize the area to record by selecting a window you have open. For added customizability, you can also manually highlight the area you want to record, and adjust the size by pulling on the edges of the frame.
If you’re looking to record 2 video streams at once for added detail to your recording, you can also capture webcam video or connect an external camera and capture footage from both sources simultaneously! MultiCam Capture Lite captures both your microphone and system audio automatically, but you can enable and disable these or even connect an external microphone to record from.

3. Adjust settings and begin recording
Review the settings menu before beginning your recording to personalize the capture you’re about to record. The settings menu allows you to choose your file name and location, choose if you want mouse clicks animations to show in your finished recording, and more.
Each video feed has adjustable settings for brightness, contrast and quality that can be adjusted before you begin to ensure the recording you capture is clean, crisp, and requires minimal editing after it’s been captured! With your settings adjusted, you can click record and begin to screen record your presentation.
Why choose VideoStudio for screen recording?
VideoStudio has all the tools you need to record your screen, webcam video and system audio simultaneously with MultiCam Capture Lite. Download VideoStudio’s free trial today and see how VideoStudio’s award-winning combination of ease of use and breakthrough creativity to make video editing even more fun! Easily add creative graphics and titles to keep your recorded presentations organized, or get creative with compilations of your best presentations.
Explore more ways to use the built-in screen recording tools in VideoStudio
 How to create tutorial videos
  How to make webinars
  How to screen record PC gameplay
  How to record webcam video
 Need to screen record a presentation?
Download VideoStudio’s FREE 30 day trial today!