Table of contents:
My 360° camera has become my best travel companion. It enables me to capture amazing videos and pictures that can be transformed to explore different and unusual angles, making each shot unique and fun.
A 360° camera combines two or more fisheye lenses, capturing everything around you in all directions. The images captured can be stitched using a dedicated app on your smartphone or computer, and then edited in a 360° editing software like VideoStudio. You can also visualize them in different formats such as equirectangular, fisheye, dual fisheye and VR.
When I bought my first 360° camera, I was afraid it would be difficult to learn how to use it, but it was extremely intuitive! I love that while I am taking a photo or video, I don’t need to worry about getting the perfect angle, as the camera is capturing everything around me. This versatility means I can simply reframe my content afterward to create cinematic shots with ease. From tiny planet and rabbit hole effects, to format conversion, I can reframe my 360° content in so many different ways! I immediately fell in love with my 360° cameras and everything I could do with it.
One of my favorite types of 360° content to create are tiny planet videos. With the right equipment and 360° editing software, you can create amazing tiny planet videos. Follow my tips below, and you’ll see how easy it can be to get started!
Essential 360° Accessories
One thing I love about 360° cameras is that the camera itself is very small, and you don’t need many accessories to create something great. Here are the accessories I always carry with me:
-
Protective case
It is very important that you protect your 360° camera. If lenses are left exposed, they can easily get scratched, which may ruin your shot. With most 360° cameras, the lenses are not removable or replaceable, so protecting them is key!
-
Selfie stick
A selfie stick is one of the most fundamental accessories for creating high quality 360° photos and videos. The distance that it adds between your hand and the camera lenses means you can avoid obscuring the view of the camera, and ending up with a giant thumb in your video or picture. I’ll explain this further below!
-
Small tripod base
A small tripod base is a great accessory to bring with you if you want to explore different shooting techniques. I recommend a small table tripods between 8 to 25 cm rather than full-size photography tripods, as those often have wider bases that can obscure the bottom of your 360° camera. The smaller the tripod base, the smaller the footprint that will appear in your 360° video or picture, making it less visible and easier to remove.
-
Extra power
A portable power bank or spare batteries are not must-haves, but I would recommend carrying one or the other in your bag. You do not want to risk missing an amazing shot because your camera’s battery is running low. Bringing extra power can be a lifesaver, especially when you are out traveling or shooting videos for the whole day!
Explore 360° editing in VideoStudio
Begin your free 30 day trial today!
The importance of a selfie stick
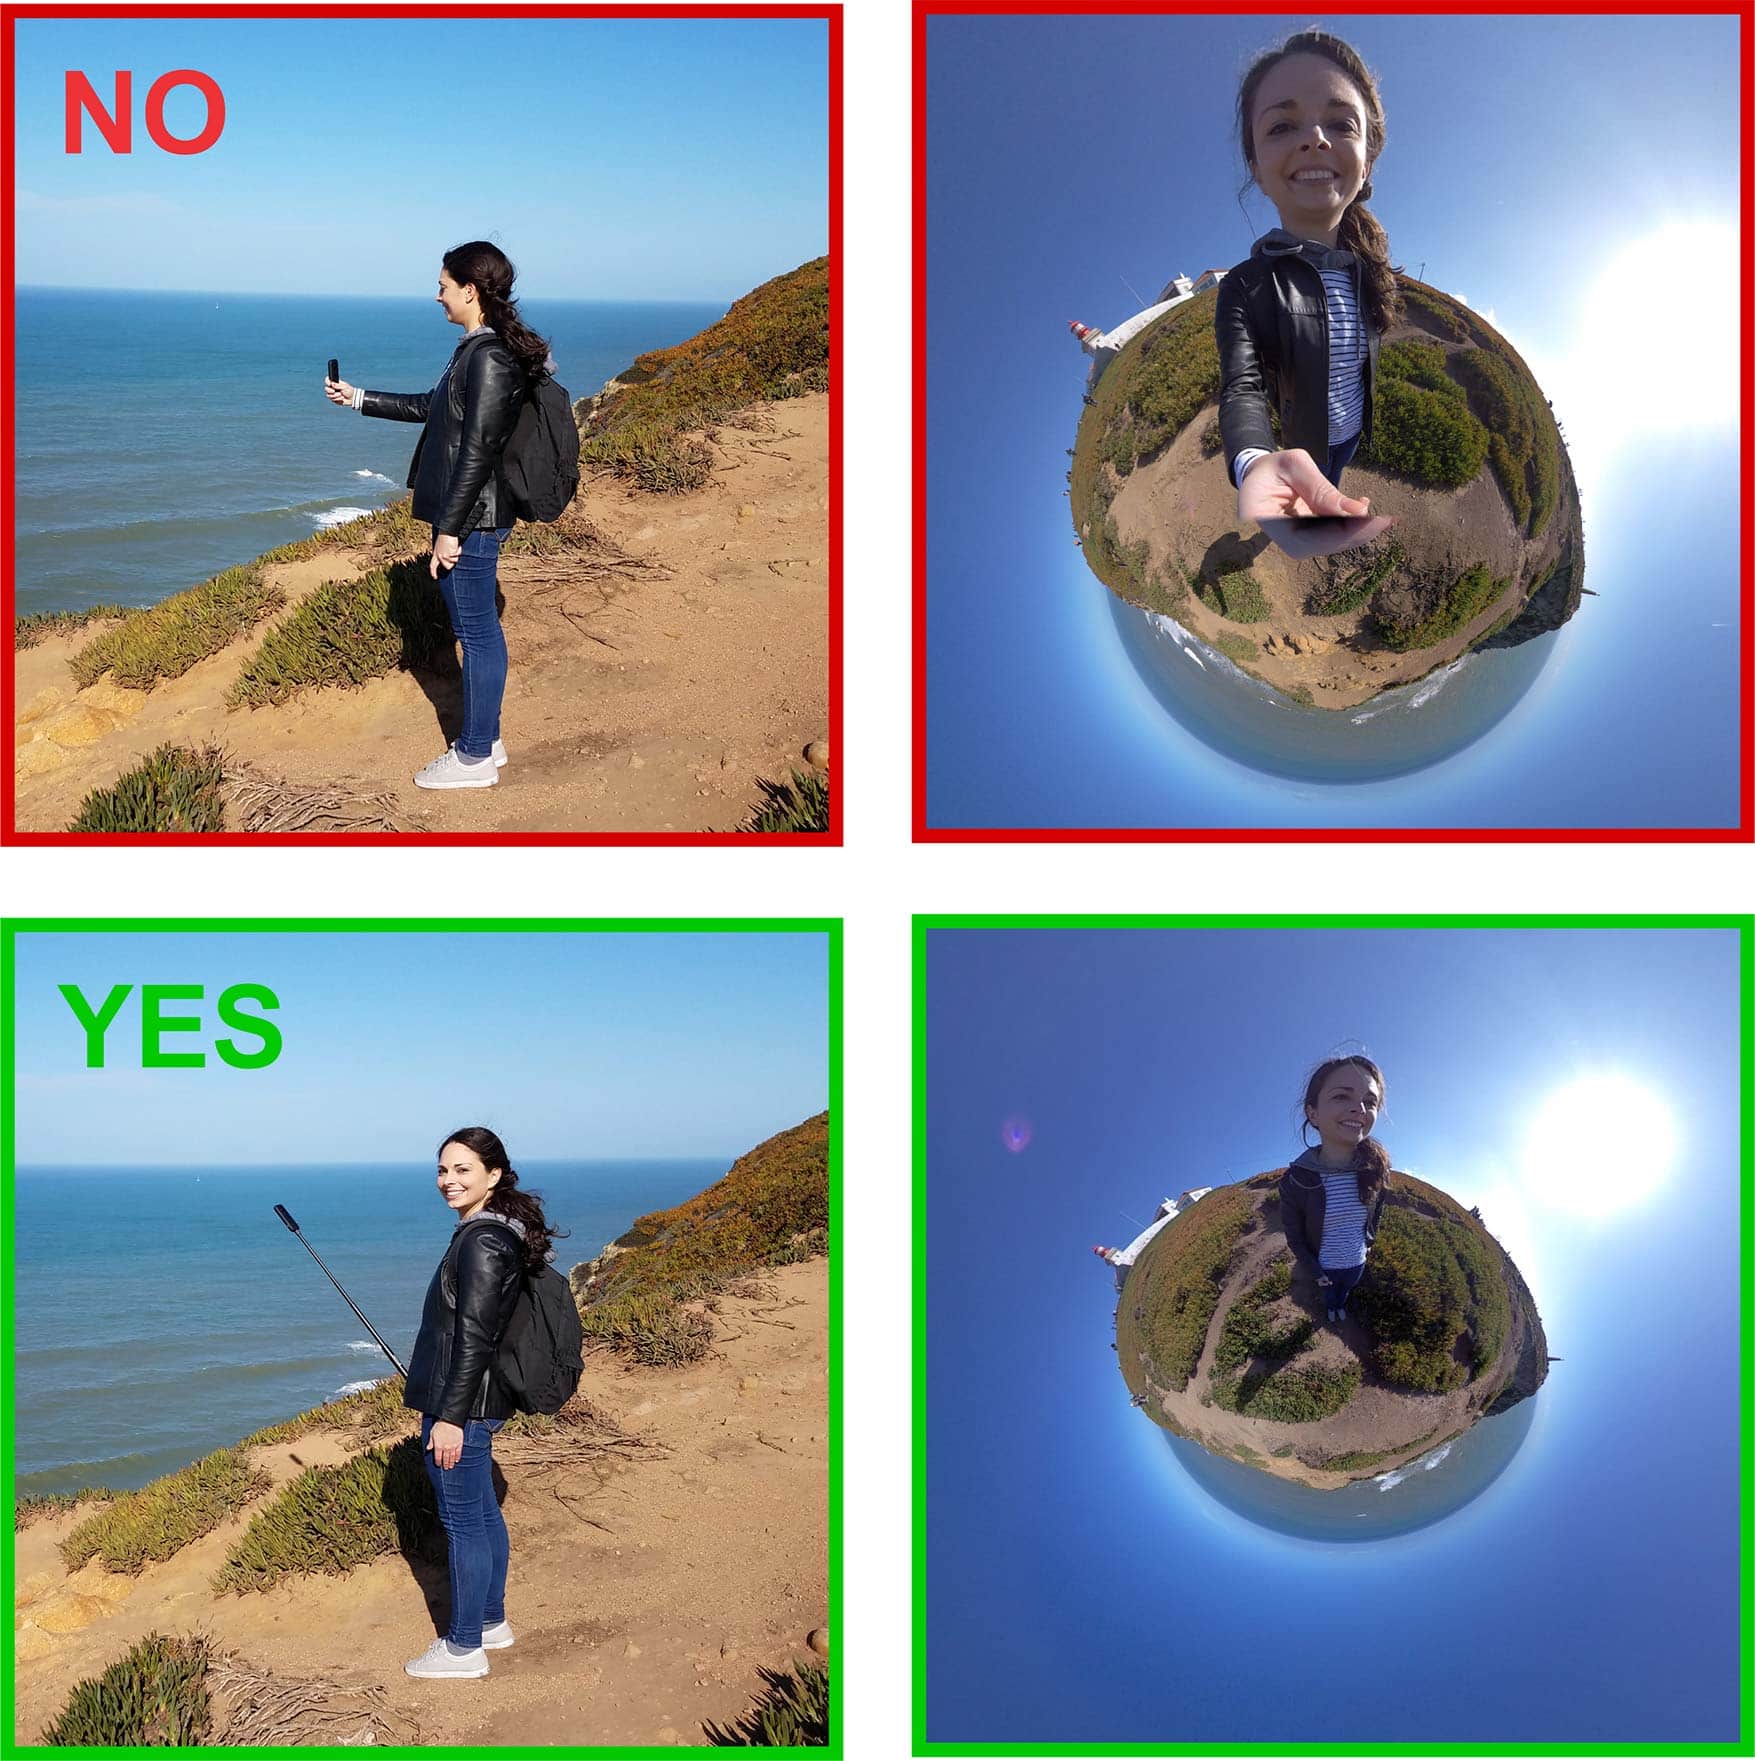
The most common way to use a 360° camera is to attach it to the end a selfie stick. When holding your camera directly with your hand, you will end up with footage where your fingers are prominent and distorted. This is because they are too close to the lenses.
Using a selfie stick will avoid this problem. The added distance from your hand to the lenses will make your hand look proportionate, and the selfie stick is usually narrow enough to fit within the blind spot that most 360° cameras have, directly beneath them! Here, you can see the difference using a selfie stick has on your end results.
Choosing the right selfie stick
Any selfie stick with a compatible mount for your camera (usually ¼-20 tripod mount) can be a good accessory, but here are some tips to help you choose the most suitable one:
Find the best compromise between folded length and maximum extended height.
A shorter folded length will make your selfie stick more portable, but poles with greater maximum length will allow you to get creative angles for “drone” effects, so try to find one that strikes a good balance.
Look for a selfie stick with smaller top disc diameter.
A smaller top attachment will reduce the surface of the black spot that you see in your 360° pictures and videos. Avoid selfie sticks with prominent knobs, especially on the top.
Consider a selfie stick with a removable tripod base.
Some selfie sticks may already come with a tripod. The tripod will give you more versatility. Aim for a selfie stick where the tripod attachment is removable. If your selfie stick does not come with a tripod, make sure that it has ¼-20 thread hole on the bottom so that you can mount it on a tripod if you eventually choose to purchase one separately.
Create your own 360° videos in VideoStudio
Begin your free 30 day trial today!
Tips for shooting like a pro
Now that you have your essential set of accessories and you have arrived at your shooting location, you may be tempted to start recording your video immediately. Without taking the time to set up your camera properly, you may end up making some mistakes that you can’t fully fix when editing your content afterward, so take a few minutes to prepare yourself and your camera following these easy steps!
-
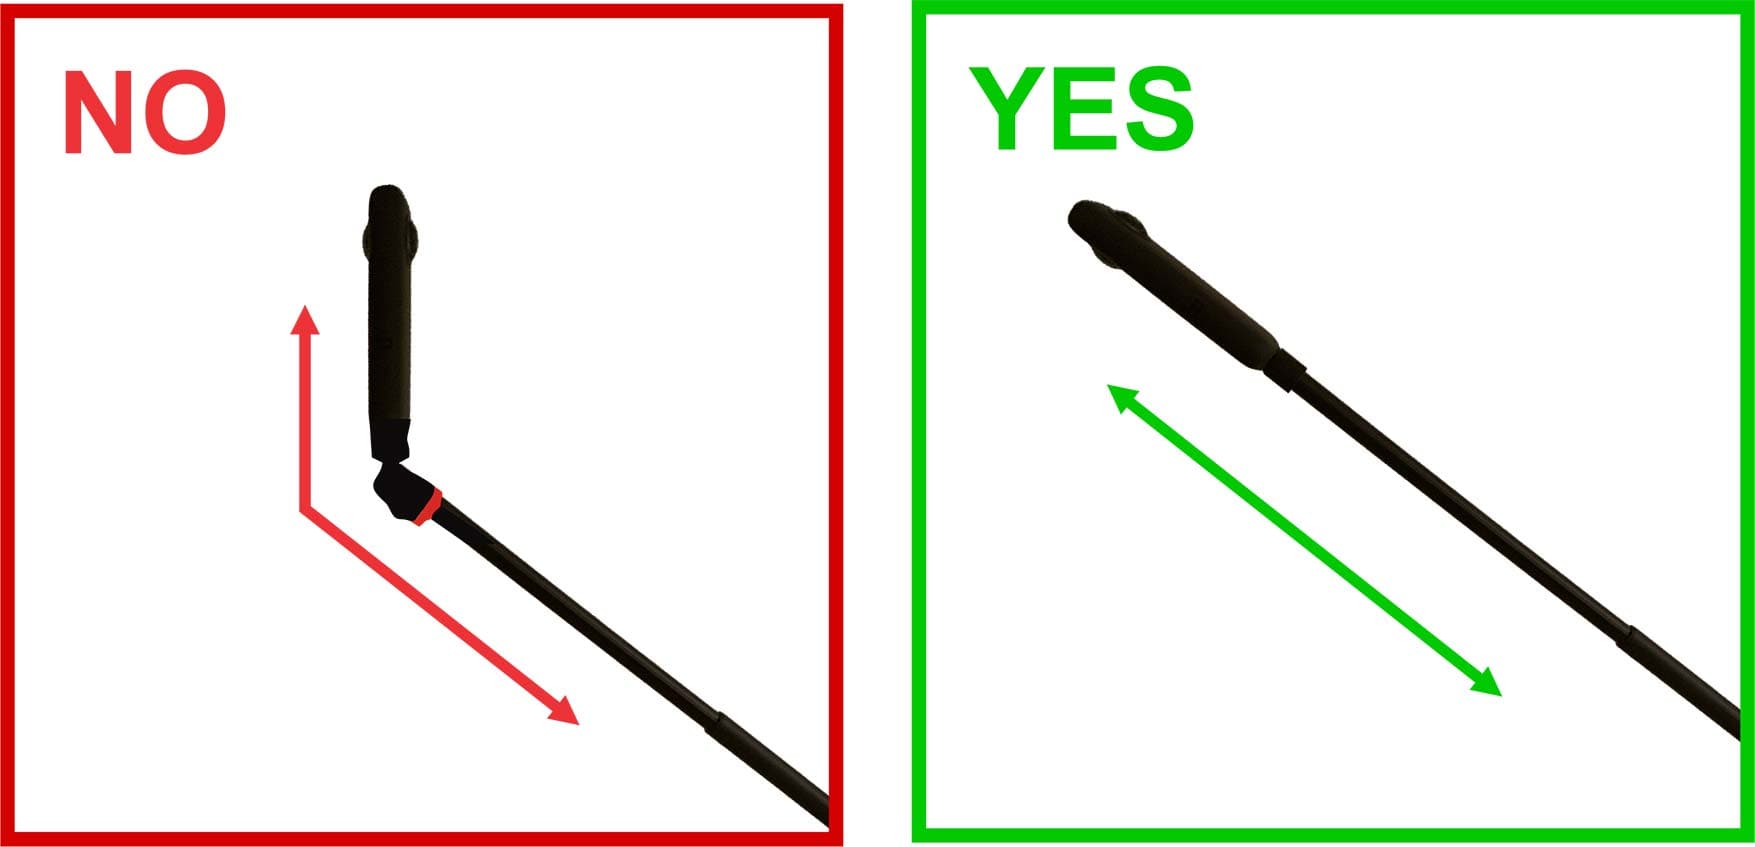
1) Mount your camera on the selfie stick perfectly straight
If your selfie stick has a tilting top attachment, you may want to tilt your camera vertically, but this will bring the selfie stick out of your camera’s blind spot, losing the effect of having an invisible selfie stick. Instead, position your camera in line with the selfie stick, extending in the same direction.
![Mount your camera on the selfie stick]()
-
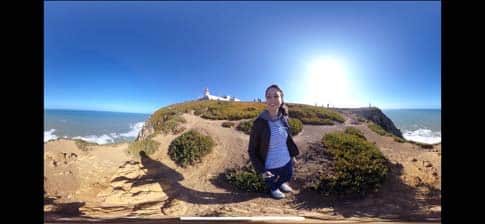
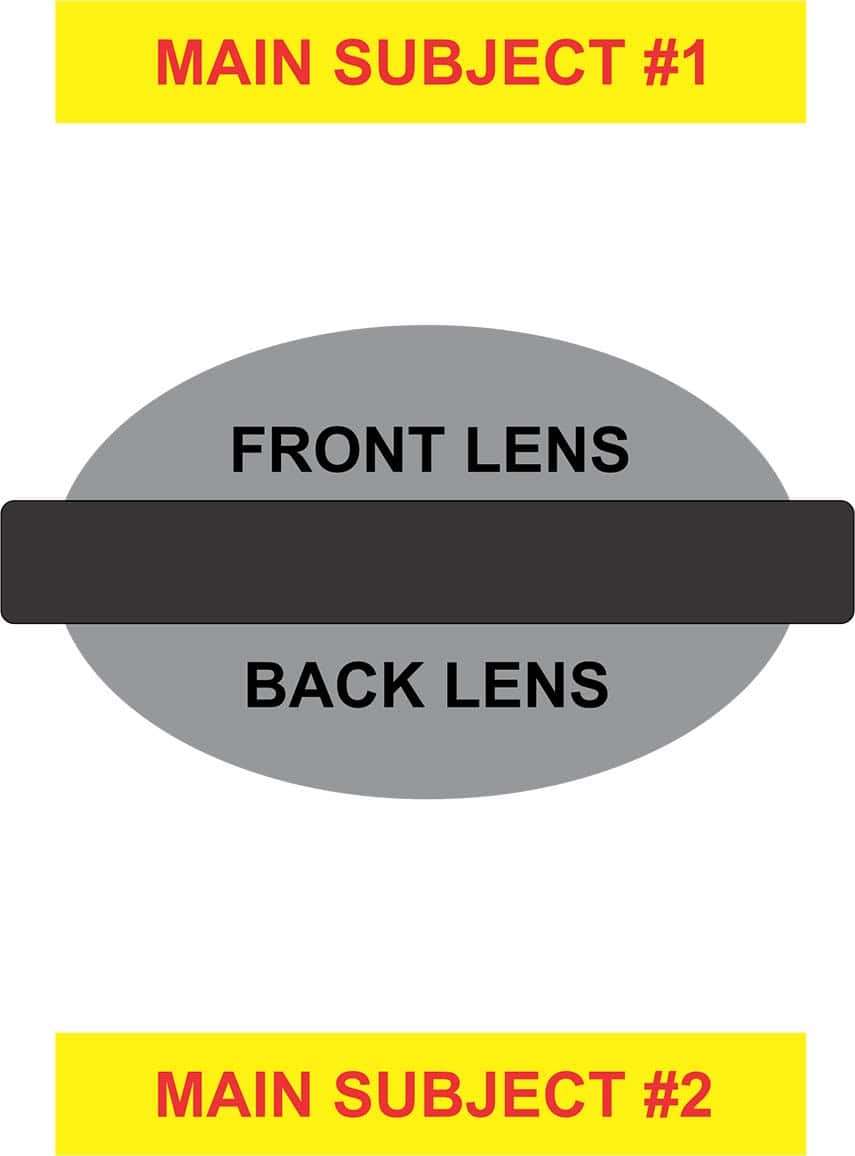
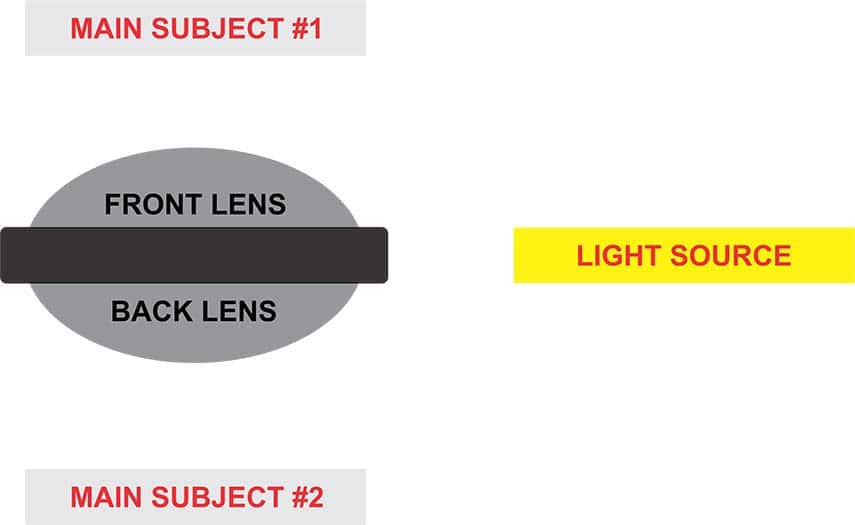
2) Keep the main subjects in front of the lenses
Before shooting, think about what the two main subjects on the scene are, one on each side of the camera. You might want to choose yourself as one subject, and the other could be a building, a monument, or almost any detail of the landscape around you. In my example, I wanted myself to be the main subject, and the cliff with the ocean view to be the other.
Make sure you are positioned so that the two main subjects are directly in front of the camera lenses on each side. To avoid distortion, I’d recommend keeping both subjects 50cm or more away from the camera.
![Keep the main subjects in front of the lenses]()
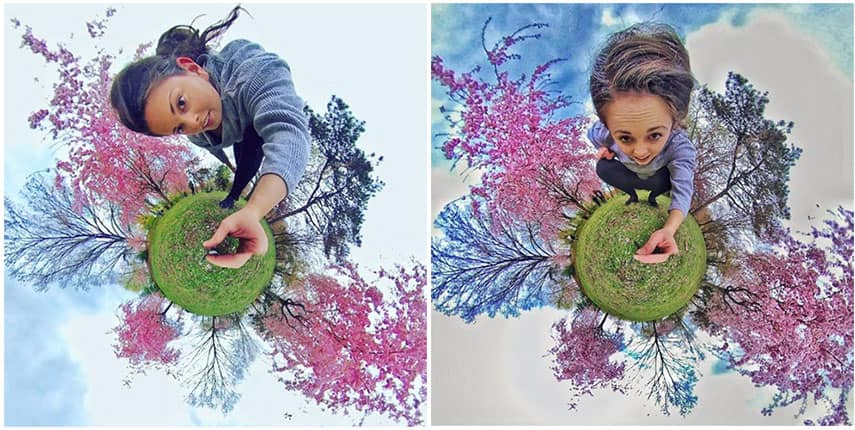
Here are some fun examples of the distortion you may get when the subject is too close to the lenses:
![Keep the main subjects in front of the lenses]()
Having your main subjects in line with your camera lenses will help you to avoid positioning them along the stitching line, the area where the two images captured by the lenses are connected. Objects captured at the stitching line may appear slightly cropped, and lines may be misaligned.
-
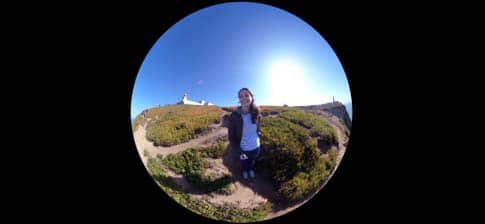
3) Position yourself so your light source illuminates both lenses equally
Taking videos or pictures with a 360° camera means that you cannot avoid the bright direct light of the sun. When possible, try to plan your shoot at a time of day with softer light. Anytime you shoot, it is very important to position your camera with the light coming from the side, so that the sun illuminates both lenses equally.
![Mount your camera on the selfie stick]()
-
4) How you hold your selfie stick and use accessories can change your effects!
Once you have identified the best direction to shoot your video, you can decide how to hold your selfie stick. There is no one right way to hold your selfie stick. How you want to hold your selfie stick and what accessories you want to use will depend on the type of shooting effect you would like to achieve.
Setup:
Selfie stick + 360° camera
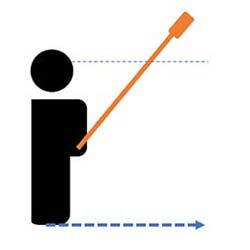
Result:
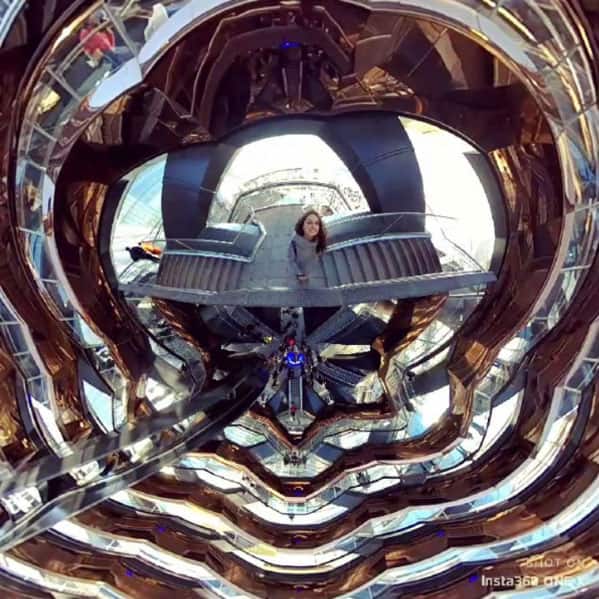
Tiny Planet effect

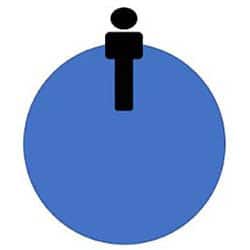
To keep myself in the center of the planet for my tiny planet videos, I usually keep the selfie stick at about a 45° angle or less fully extended and above my head. I hold the selfie stick with one hand a little bit towards one side to ensure my body posture appears natural on the video. I recommend simply walking straight towards the subject in front of you.
I usually use this technique in crowded places - so that the people that I cross along the way they look smaller - or when I want to give more importance to the surroundings.

Setup:
Selfie stick + 360° camera
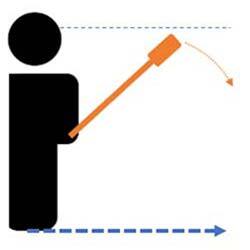
Result:
Tiny Planet effect
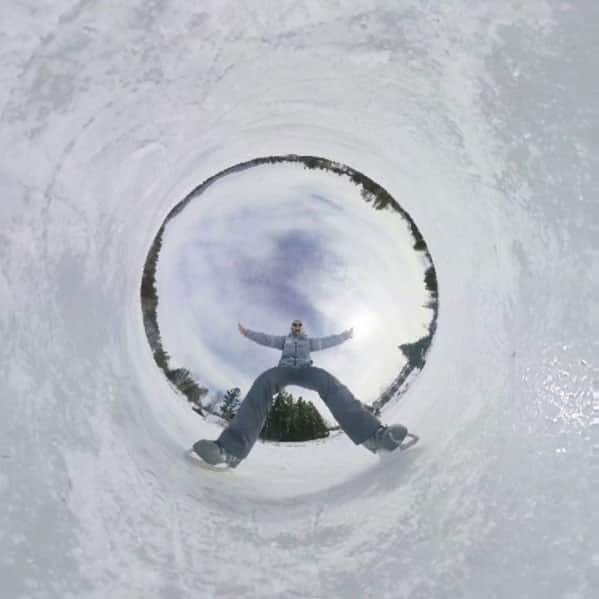
If I want to appear on the top of the planet, I can achieve that effect by lowering my selfie stick towards a 90° angle, or by editing my footage after.
For more interesting videos when I am on top of the tiny planet, I hold the selfie stick directly in front of me instead of to the side, and walk straight towards the camera.
I like to use this technique when there are no people around me, or when I am going cycling. In the video above I have just mounted my camera on the selfie stick and fixed it on the front basket with a hair tie!
Setup:
Tripod base + 360° camera
Result:
Rabbit Hole effect

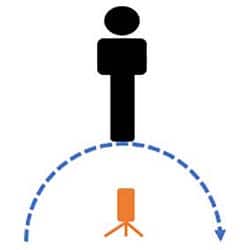
To create the illusion that I’m going around the planet or looping in a rabbit hole, I set my 360° camera up on a small tripod base in one spot, and move in a circle around the camera, keeping an equal distance away at all times. I suggest a distance of about 1.5m, but you may try different distances to achieve different effects.
The closer to the camera you are, the bigger you will appear. But don’t get too close! Keep at least 1m distance.
Tip: For more interesting Tiny Planet and Rabbit Hole videos, try to capture objects, buildings or details in the background with a variety of different heights! This will add more interest to your completed planet, and make the effect more obvious as the objects around you disappear behind the “horizon”.
Following these tips, you are ready to start shooting your video. Experiment with your 360° camera, and get creative!
Explore 360° editing in VideoStudio
Begin your free 30 day trial today!
Tips for editing 360° footage
Once you have captured your 360° photos or videos, you can explore the world of 360° photography and editing even further in a video editing software like VideoStudio. VideoStudio’s full selection of 360° editing tools allow you to easily import your 360° footage and create Tiny Planet or Rabbit Hole effects, convert your 360° footage to standard videos for playback on regular video devices, correct fisheye lens distortion, and even add titles and overlays!
Check out these fun editing tips and techniques to get started creating truly amazing 360° videos you’ll be proud to share!
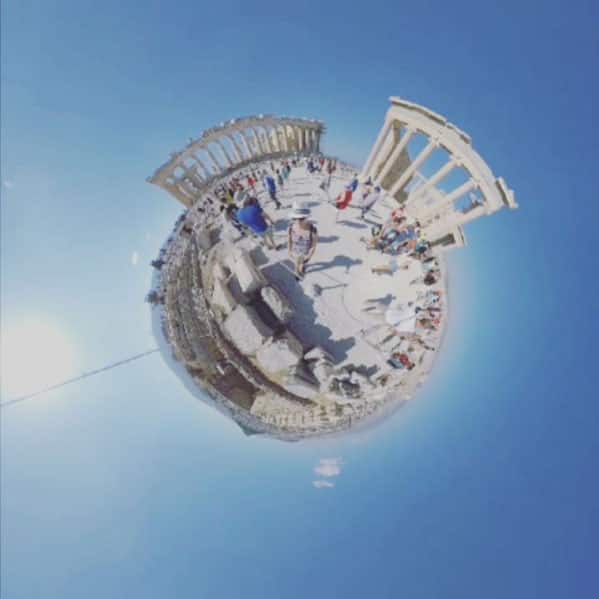
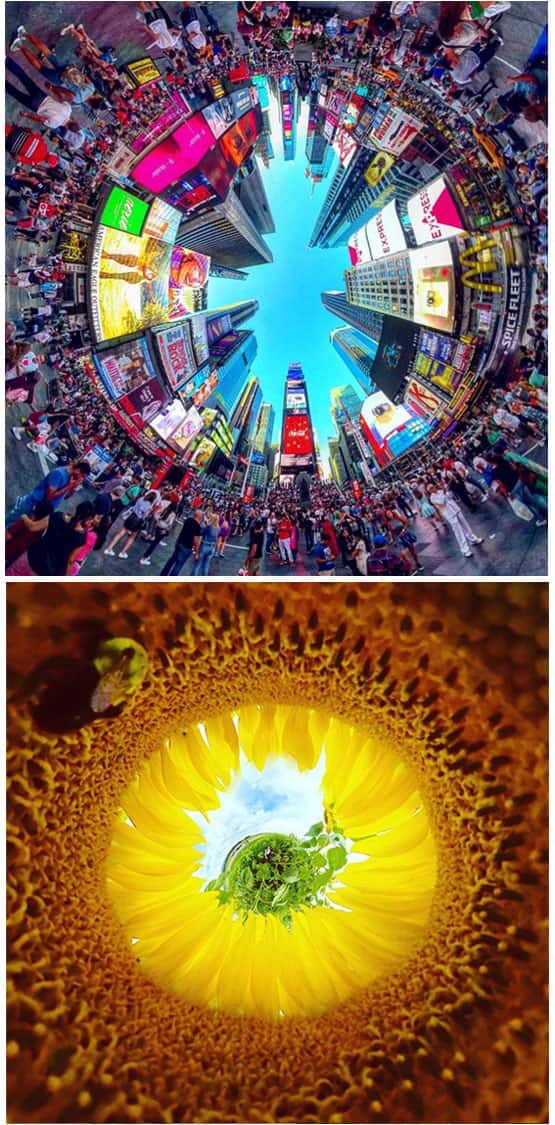
Tiny Planet effects
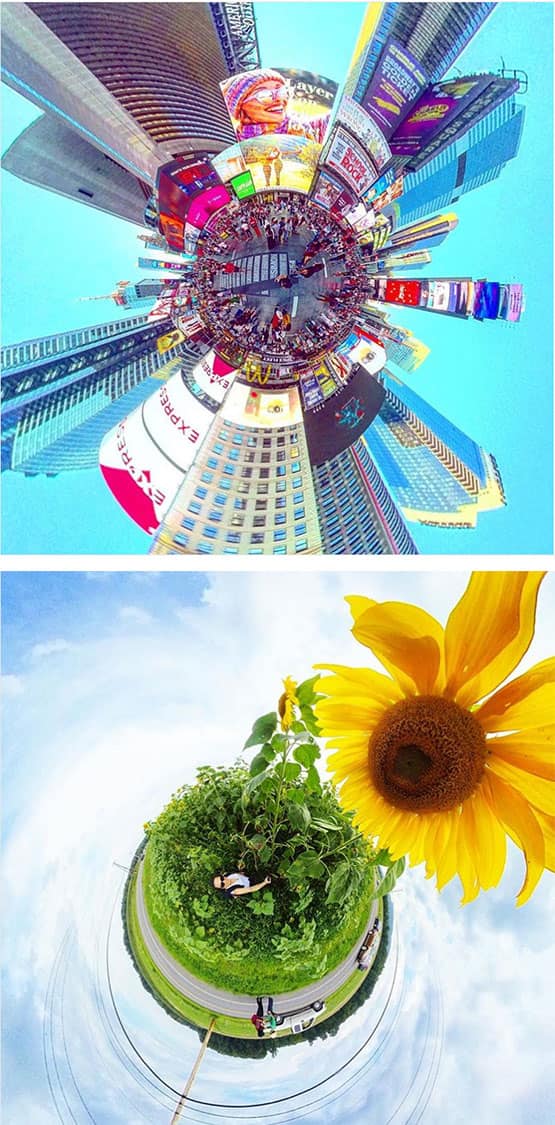
Tiny Planet effects are one of the most popular editing techniques used by 360° video editors! This effect connects the bottom edge of your footage into the center of the screen, creating the unique illusion that you’re standing on a miniature planet!
It’s easy to apply a Tiny Planet effect to your 360° footage in VideoStudio. Simply right click on your clip in the timeline, and then select 360 Video > 360 Video Conversion > , and then either Equirectangular to Spherical Panorama or Dual Fisheye to Spherical Panorama, depending on the format of your original footage.
Once you click to convert to Spherical Panorama, VideoStudio will create a preview of your tiny planet beside your original footage, and open options to rotate, zoom, and change between tiny planet and rabbit hole effects to transform your footage even further!
Tip: If your 360° footage is in Single Fisheye format, you’ll first need to convert it to Equirectangular by right clicking the clip, selecting 360 Video > 360 Video Conversion > Single Fisheye to Equirectangular, exporting that clip, and adding that reformatted clip to your project.
 @my360journey
Rabbit Hole effects
The Rabbit Hole effect reverses the distortion direction of the Tiny Planet effects, connecting the top edge of your footage into the center of the screen to create the illusion that you’re looking upwards from inside a rabbit hole.
You can create a rabbit hole effect with your 360° footage in VideoStudio in the same way you would apply a tiny planet effect. Simply right click on your clip in the timeline, and then select 360 Video > 360 Video Conversion > , and then either Equirectangular to Spherical Panorama or Dual Fisheye to Spherical Panorama, depending on the format of your original footage.
Once you click to convert to Spherical Panorama, VideoStudio will create a preview of your tiny planet beside your original footage, and open options change your tiny planet to a rabbit hole effect! You can get creative with additional sliders to control rotation and zoom for your 360° footage to control the size of yourself and the objects around you.
Tip: If your 360° footage is in Single Fisheye format, you’ll first need to convert it to Equirectangular by right clicking the clip, selecting 360 Video > 360 Video Conversion > Single Fisheye to Equirectangular, exporting that clip, and then importing that reformatted clip to your project.
 @my360journey
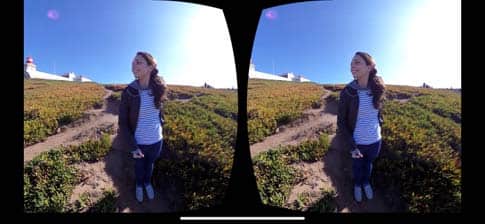
Convert 360° footage for easy viewing
If you want your 360° footage to be playable on normal devices and TVs screens, you can simply convert your 360° video to a standard format! This allows you to control the perspective you’re showing your audience.
Converting your 360° footage to play on standard TVs and screens ensures you can share your 360° photos and videos with any audience! It’s easy to convert the format of your 360° footage to standard, equirectangular, or another format that fits your needs in VideoStudio. Simply right click your video on the timeline, then select 360 Video > 360 Video to Standard >, and then choose the option that starts from your footage format.
This will open a window showing your original footage and the new output side by side. Drag in either panel to adjust the angle shown on screen as the video plays, and keyframes will be automatically created to match your movement. You can then drag the created keyframes around to customize your camera’s motion. Click ‘OK’ to complete your camera edits and add your converted video to the timeline! You can reset your 360 footage at any point by right clicking it on the timeline, and selecting 360 Video > Reset 360 Video.
Combining editing techniques
For truly high impact 360° videos, try combining a number of these editing techniques to give your audience the full 360° experience! VideoStudio’s full suite of 360° video editing tools make it easy to dive into 360° video and get creative.