How To Freeze Video
You can freeze video with video editing software like VideoStudio. Follow along with our tutorial below to learn the easiest way to freeze video. Freezing a video gives you lots of flexibility in the edit. Freeze a frame to extend it for as long as you like to give you some time to add text. Freeze it in the middle of action to build suspense and add dramatic emphasis. Whether you’re editing a corporate video, a short film or holiday footage of your kids learning to swim, learn how to freeze video below.
You can freeze video to showcase a specific frame in your video by extending the length of time that frame displays. For example, you can freeze a frame to showcase the video frame where a goal is scored in a sporting event or use it to showcase a smile or reaction that you’ve captured. When you apply a Freeze Frame to a video clip, the clip is automatically split at the freeze point and the frame you choose is inserted as an image file (BMP) and displayed on screen for the duration that you set.
-
Install VideoStudio
To install VideoStudio video editing software on your PC, download and run the installation file above. Continue following on-screen instructions to complete the setup process.
-
Select Your Video Clip
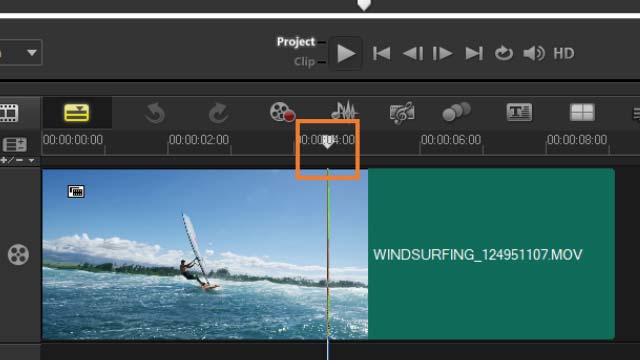
Select the video clip on the timeline that you want to freeze.
![Freeze Video]()
-
Find the Frame You Want to Freeze
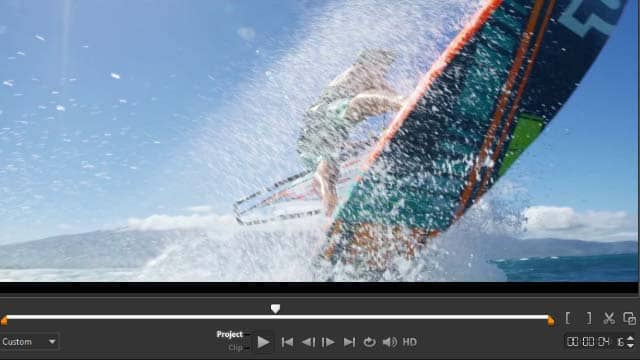
Move your scrubber to the frame of the video you want to freeze. The selected frame will displays in the Preview window. Note: The Previous and Next buttons in the Navigation panel let you navigate a clip frame-by-frame to find the frame you want.
![]()
-
Select Freeze Frame Tool
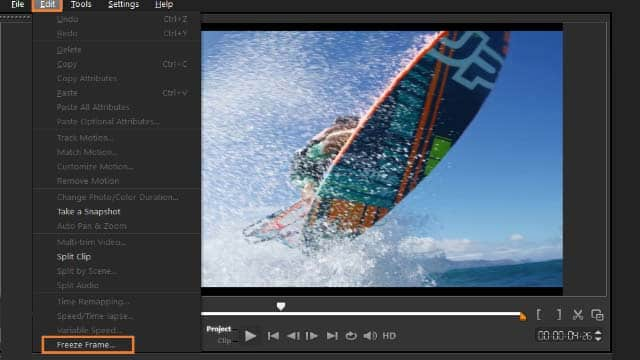
In the Edit menu along the top, select Freeze Frame.
![]()
-
Freeze Your Video
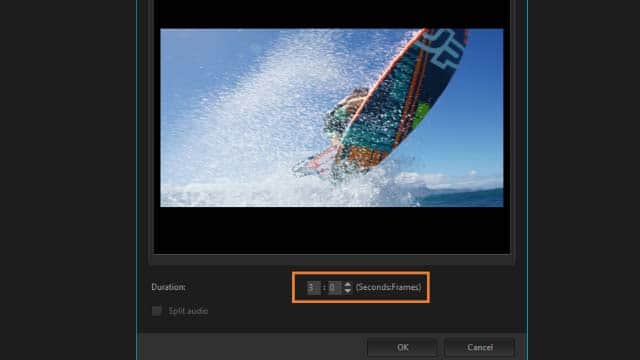
In the Freeze Frame dialog box, set the Duration you want to make this. Note: If you want to suspend audio on other tracks during the freeze, enable the Split Audio check box. This splits and suspends all audio-related tracks (voice, music, video overlays) for the duration of the video freeze.
![]()


