How To Create DVD Menus And Chapters
You can create dvd menus and chapters with video editing software like VideoStudio. Follow along with our tutorial below to learn the easiest way to create dvd menus and chapters. Burning a video to DVD is one thing, but there are also ways to bring your DVDs to life. Add menus and chapters to make your DVDs professional and easy to navigate. It’s an excellent way to make your content stand out from the crowd and not become just another low budget movie.
Disc menus allow viewers to easily navigate through the contents of a disc and easily choose the specific parts of the video to watch. In Corel VideoStudio, you can create disc menus by applying menu templates and editing them to suit the requirements of your projects.
This feature is available only when the Create menu option is selected. By adding chapters, you can create submenus linked to their associated video clip. When you add chapter points to your VideoStudio project, these are automatically converted to disc menu chapters.
Represented as a video thumbnail in a submenu, each chapter is like a bookmark for a video clip. When viewers click a chapter, the playback of the video will start from the selected chapter.
-
Install VideoStudio
To install VideoStudio video editing software on your PC, download and run the installation file above. Continue following on-screen instructions to complete the setup process.
-
Burn to disc
When your video is complete, go under the Share tab in VideoStudio, click burn to disc. This opens the DVD menu where you can create menus and add chapters.
![Burn to disc]()
-
Identify chapter points
First, we need to set up our chapter points, select ‘Add/Edit Chapters.’ Drag the scrubber along the video to the section you wish to add a chapter point, and click ‘Add Chapter’. You can also click Auto Add Chapters to let VideoStudio automatically select chapters. Repeat this step until you have added all of your desired chapter points and click OK. To remove unwanted chapters, you can use the ‘Remove Chapter’ or ‘Remove All Chapters’ prompts. Once your chapters are in place, select ‘Next.’
![Identify chapter points]()
-
Preview and select a menu template
Next, we need to select a template for our DVD menu. Scroll through the options and select the one you like. You can preview your DVD menu by pressing the ‘Preview’ button. Customize any text by double clicking on the text in the preview window.
![Preview and select a menu template]()
-
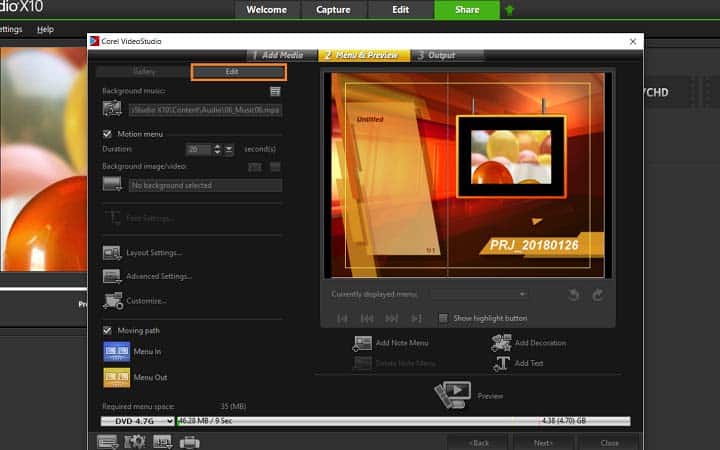
Customize menu
To make customizations to DVD menus, select the edit tab. You can add custom music, change background image, add motions to menus and more. Note: Using motion menus increases the file size. Check the disc space usage indicator and the Required menu space value to make sure that the file size remains within the limits of your selected output.
![Customize menu]()
-
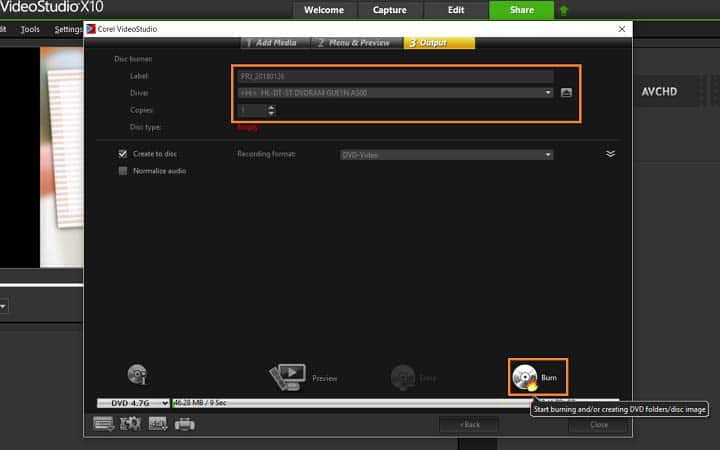
Start burning
Once your DVD menu and chapters are setup, press Next. Insert your DVD into your DVD burner and press Burn.
![Start burning]()